

How to Read Engineering Drawings & Symbols?
Mastering the art of interpreting engineering drawings is like accessing a treasure mine of knowledge; once you understand the foundations, the possibilities are limitless. Unlike models, which provide a visual depiction, engineering drawings dig into the intricacies, including dimensions, tolerances, finishes, and materials. These designs serve as blueprints for building, directing engineers through the complex production and assembly process.
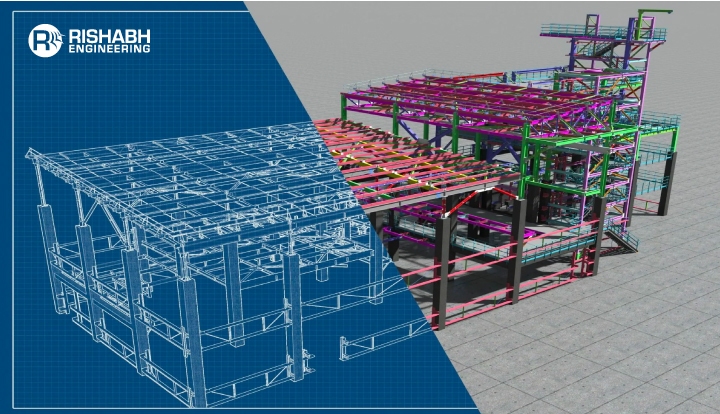
As an experienced multidiscipline engineering design company, our team of designers & engineers utilize engineering drawing symbols for varied engineering projects.
What Are Engineering Drawings?
Engineering drawings (also known as blueprints, prints, drawings, or mechanical drawings) are detailed outlines that represent the information and requirements required to build a certain item or product. It is more than a drawing; it is a graphical language communicating ideas and information. They employ a defined collection of symbols, lines, and forms to represent the exact information and specifications required to create a product or object. These drawings provide critical information such as dimensions, geometry, tolerances, material type, finish, and hardware required for mechanical engineering projects. They use projection to convert complex three-dimensional objects into two-dimensional representations, allowing engineers and other design professionals to communicate more effectively. These drawings are distributed to multiple departments, including manufacturing, assembly, vendors, and archives, to ensure seamless collaboration and adherence to design intent throughout the production cycle.
What is the Purpose of Engineering Drawings?
A technical or mechanical drawing comprises all the necessary information for manufacturing a part or assembling components through welding and building. This includes dimensions, part identification, and other information, allowing manufacturing engineers to start production immediately after receiving the drawing. However, we must emphasize to our consumers that drawings submitted for immediate pricing and manufacturing in our system and 3D models do not require this degree of information. Following our design requirements, CAD files, and drawings provide the information required to create your product. The lone exception is when tolerances are specified. Nonetheless, mastering the concepts and practices of formatting is still critical in the sector, especially for conventional manufacturing enterprises that rely on precise drawings.
Engineering Designs in Process Industries
Piping and Instrumentation Drawings (P&IDs) contain engineering drawings developed for process industries to give pump layouts. These drawings depict the schematic organization of process pipework, valves, vessels, and instrumentation locations for control and measurement. Piping isometric drawings and structural detail drawings depict the actual piping and structural support configurations. Because the real arrangement drawings show the characteristics and linkages of a pump, they are the primary drawings for the precise installation of a pump or other process equipment. Learn about Piping and Instrumentation Diagrams (P&ID), their importance in many industries, the symbols used, and a step-by-step method to creating them. They differ from mechanical drawings because they provide a holistic view of complex systems. They talk about mechanical equipment, control devices, and process pipelines, among other things. These drawings are valuable tools for engineers because they include crucial information such as pipe classes, flow direction, and connection references. Explore the essentials of how to draw a P&ID diagram, the steps, and the best approaches.
On the other hand, PFDs (Process Flow Diagrams) provide a more complete picture of a system. They provide engineers with a high-level overview of key equipment, process piping, and operational data, allowing them to visualize the entire process. While engineering drawings are effective independently, they are frequently supplemented with models to provide a visual representation. Models and drawings work together to provide engineers with numerous viewpoints on the design, ensuring a thorough grasp of it.
Components of Engineering Drawings
Engineering drawings typically contain several key components that convey detailed information about a design. Here are the primary components:
Lines: It is an important function in portraying the structure of a component. The engineering design (ED) represents visible and concealed boundaries and centerlines. Notably, not all lines are made alike; they change in thickness and style to represent various features of the thing. Continuous lines, often known as drawing lines, define the physical boundaries of an object. These lines define the component’s geometry, with larger lines representing exterior contours and thinner ones showing inside details.
Title Block: Contains key information about the drawing, such as the title, project or part name, designer/drafter name, date, and revision information. Information blocks are another essential component of an engineering drawing. Usually found in the bottom right-hand corner, these blocks contain critical information on the part’s assembly. They provide details such as the drawing’s purpose and intended recipient, part number, brief description, material, and finish. These details help ensure clarity and consistency throughout the manufacturing process. The title block provides the foundation for interpreting the drawing. It includes important information such as the name and address of the company that created or owns the drawings, the part number and description, mass, material, general tolerances, units, finish, projection details, scale, revision number, and the drawing’s status. In circumstances when specific data on the drawing clashes with the title block, the notes outside of the title block should take priority.
Revision Block: Captures the number, date, and description of modifications made to the drawing during revisions. Assembly drawings simplify complex systems by showing how individual parts fit together. It can be used in conjunction with part drawings to minimize overly detailed documentation. They use exploded views, section views, cut-outs, detailed views, numbered pieces, and general dimensions to clearly demonstrate where each item goes and how it is attached.
Drawing Views: Graphical representations of the object under design. Orthographic (front, top, side), isometric, sectional, and detailed views are all common types of views. Various viewpoints are important in mechanical engineering and production drawings because they provide critical information about a design. It is critical that each view has a specific purpose and adds to the overall understanding of the design. Just as with dimensioning, it’s best to employ as few views as possible, highlighting only the essential components.
- The isometric view gives a three-dimensional image of the part. In this view, parallel lines are portrayed at a 30-degree angle to the horizontal, as opposed to vertical lines in two-dimensional drawings. This keeps vertical and parallel lines true to their length, allowing for easy dimension scaling. Therefore, it is vital to understand that angled lines in an isometric perspective do not indicate dimensions. And, while an isometric view could resemble a perspective view, it stays true to the actual dimensions of the object, avoiding any optical illusions.
- Orthographic views are important in engineering drawings because they detail a component’s mechanical and geometric aspects. These views depict a three-dimensional item in two dimensions, ensuring that important features for part fabrication are presented correctly. Unlike other perspectives that may distort lengths, orthographic views retain dimensional precision. Multi-view designs often include three common views: front, top, and side. The layout and interpretation of these perspectives are influenced by regional customs, with first-angle projection being more popular in Europe and third-angle projection in America and Canada. Additional perspectives may be required to present all important data fully.
- View in Flat Pattern: A flat pattern view depicts a bending pattern on a folded sheet metal item. It illustrates the geometry of bending sheet metal after cutting it.
- Section view: A section view shows part features that are not visible in normal views. Cross-section views are recommended over hidden lines (as previously stated) because they provide greater clarity. Cross-hatching is used to depict solid material in cross-sectional images.
- Cut-out view: A cut-out view overlays cross-sectional views on a conventional orthographic view, allowing you to see a tapped segment without requiring a full section view. It minimizes the number of views required for a given drawing.
- Detailed View: In complex designs, certain places necessitate detailed inspection to assure precision. A detailed view focuses on a specific section, allowing engineers to investigate delicate details in greater depth. It’s like using a magnifying glass to examine a small section of a larger picture.
- Auxiliary View: Not every surface perfectly aligns with the standard horizontal and vertical planes. When displaying sloped surfaces with no distortion, an auxiliary view is used. It provides a more realistic representation of the object’s geometry by projecting it from a different angle.
Each view is a tool for mechanical engineering to efficiently communicate critical information, ensuring that designs are understood and performed correctly.
Dimensions: Specify the size and location of drawing features. They are labeled with numbers and arrows to indicate their extent or distance. The dimensions of an ED are critical for guiding the fabrication of an item. However, it is crucial to note that not every measurement of every line is required. Over-dimensioning can cause confusion and mistakes throughout the production process. Instead, concentrate on important aspects such as geometric dimensions and tolerances (GD&T). These guarantee that pieces fit correctly, resulting in longer life and less maintenance. Lower and upper limits, often known as fit classes, are important in mechanical or manufacturing drawings because they ensure precision and functionality.
Notes and Annotations: Provide additional information that may not be seen from the drawing views. They may comprise material specifications, tolerances, surface finishes, assembly instructions, and other important information.
Symbols and Abbreviations: Effectively express specific information. They may denote geometric tolerances, surface finishes, welds, fasteners, electrical components, or other standard elements.
Bill of Materials (BOM): BOM in assembly designs contains all the components required to make the assembly, along with quantities and, in certain cases, part numbers or descriptions.
Revision History: Includes the dates, descriptions, and signatures of those who made or approved alterations to the artwork.
How to Read an Engineering Drawing Symbol
Reading engineering drawing symbols requires familiarity with commonly used symbols and their meanings. Here’s a general approach to interpreting engineering drawing symbols:
- Understand the Drawing Context: Think about the type of drawing you’re looking at (mechanical, electrical, or architectural) and the symbols that are typically employed in that context.
- Refer to the Legend or Key: Many artworks include a narrative or key that explains the symbols depicted. If available, consult this key for clarification on the meaning of symbols.
- Recognize standard symbols: Learn the common symbols used in engineering drawings. These could include symbols for various materials, geometric characteristics, surface finishes, fasteners, electrical components, etc.
- Note Annotations: Pay attention to any annotations or labels accompanying symbols. These annotations frequently provide additional information or context, clarifying the symbol’s meaning.
- Consider Scale and Context: Consider the drawing’s scale and the context in which the symbols are employed. Some symbols may have varied meanings based on their placement in the painting.
- Consult Standards and References: If you encounter symbols you don’t understand, consult engineering standards, reference materials, or experienced colleagues for clarification.
- Practice Interpretation: Regular practice in understanding engineering drawings will help you become more familiar with symbols and their meanings over time.
- Ask for Clarification: If you’re confused about the meaning of a symbol, don’t be afraid to question the person who developed the drawing or someone with experience in interpreting engineering drawings.
Final Words
Mastering engineering drawings opens a world of precision and opportunity. Engineers who understand symbols, abbreviations, and components can browse designs more confidently. Dimensions, information blocks, and title blocks guarantee consistency and correctness. Geometric accuracy and tolerance ensure operation and durability. These blueprints, rich in dimensions, tolerances, and materials, serve as guides for building and assembly as part of various engineering disciplines, including mechanical engineering. Further, understanding P&IDs and PFDs enlightens complex systems while models improve visualization. Our multidisciplinary engineering services team uses engineering symbols across various projects to ensure clarity and accuracy.
Seek Help With Engineering Drawing?
Our team leverages industry leading tools to unlock the secrets of precision & clarity of engineering drawings.
Frequently Asked Questions
What use do engineering drawings serve?
EDs are generally utilized in various civil and mechanical engineering applications, such as design detailing, dimensioning, and tolerance. An ED in a pipe and instrumentation diagram (P&ID) depicts the interaction between piping, process equipment, instrumentation, and control devices to explain an entire process. A P&ID can be part of a process flow diagram (PFD), which depicts the overall flow of a plant process and the relationship between main equipment at a plant facility. Individual components in a P&ID or PFD may have their own engineering drawing to provide more detail for individual pieces, such as when installing a component.
How can I interpret scale drawings?
Scales are frequently used to detail a huge thing on a smaller size or to highlight the complexity of a smaller item on a larger scale.
When scaled down to 1:10, the drawing becomes ten times smaller than in real life.
When scaled up, i.e., 10:1, the drawing seems ten times larger than in real life.
The scale of the drawing is specified in the title block.
What are the four essential components of dimensioning?
- Dimensions: text, lines, and arrows
- Extension Lines & Gaps
These are consistent throughout the drawing to avoid confusion. The title block contains units for the dimensions.
Related Blogs
Related Blogs
Detailed Engineering Considerations for Project Success
Engineering projects today require meticulous planning and execution across various…

Navigating the Green Hydrogen Value Chain
Green hydrogen is a powerful contender for a more sustainable…

Green Hydrogen Production Challenges & Solutions
Hydrogen, mainly green hydrogen, has emerged as a beacon of…